
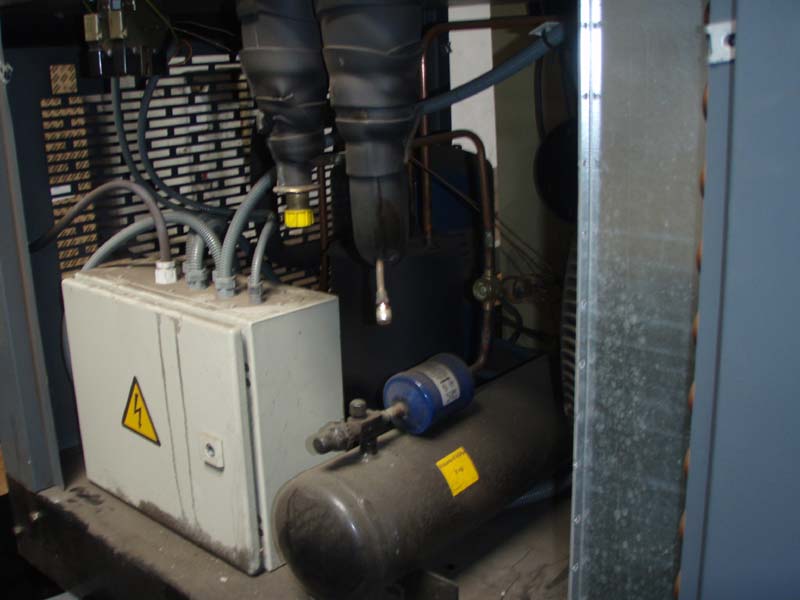
Simple refrigerated air dryer troubleshooting can save the end user money, time, and lost production. These steps can performed by anyone familiar with mechanical devices and/or machinery. A knowledge of refrigeration or theory Is not required.
Contact us if you need support for your Refrigerated Air Dryer.
Indications Of Refrigerated Air Dryer Problems
The first indication of trouble is usually moisture in the compressed air. It is always a good idea to check the system at the start of each shift. This can easily by accomplished by simply pointing an air gun in a safe direction (I.e., away from any nearby personnel, materials, or objects, etc.) and depressing the activation trigger or lever. Look for mist or liquid water in the air stream. If there is no apparent mist or water, chances are there is no major problem.
The second indication of a problem usually manifests in the form of a faulty finishing process. In the case of a painted, anodized or powder coated finish a “run” or holiday may appear.
Air bearings in machining centers are especially susceptible to moisture in the compressed air. The repair of the bearings may cost several thousand dollars.
In any event, if there is evidence of a refrigerated dryer having failed the following steps should be taken prior to calling your compressor repair facility. The repair technician will most often follow these exact same steps prior to commencing more advanced techniques.
The tech will repeat some of your efforts.
Steps To Troubleshoot Refrigerated Air Dryer Problems
First, make sure the heat exchanger (looks like a radiator) is free of trash or other debris. The exchanger should be clean and dust free. A ridiculously small amount of dust or dirt will have a huge negative impact of the efficiency of the refrigeration process.
Second, make sure the bypass valves have not been repositioned. Bypass valves are installed to allow service of the dyer and filters without shutting the compressed air system down. Usually, the brief interval required to service the dyer drain or the filter elements will not have a negative impact on the manufacturing process. Make certain the valves are not still in the bypass configuration following a routine service. Also make sure no one has inadvertently repositioned the valves during normal site maintenance, cleaning or just moving around the area.
Next would be to test the drain for the trap. All refrigerated dryers use a trap to catch the liquid water removed from the air stream. The trap will have a drain. Usually a solenoid timed drain. Or in the case of more efficient and higher quality dryers, a zero-loss type drain. Most dryers will have a drain test feature on the control panel. If there is no test function remove a panel and activate the manual test button.
Associated Systems and Components
The next inspection will not involve the dryer at all. The aftercooler on the compressor uses the same trap/drain combination utilized on the dryer. A blocked or malfunctioning drain directs liquid water into the dryer.
As this will result in liquid water circulation through the dryer then into the system. A dryer removes water vapor by reducing the temperature of the incoming air. Therefore, please see this article for a more complete explanation of how a dryer removes water from the air stream.
Ambient Environmental Conditions
The next situation is more common than you might imagine. Check the ambient temperature of the dryer location. If the air around the dryer is over 100° F, the dryer is not operating in an area that meets the design criteria of most refrigerated dryers. Again, go to this article to determine if this is a problem. Is additional ventilation needed? If new dryer has been installed chances are it was the lowest cost option available. This may only be a problem during the hotter times of the year. A high-temp dryer or a larger dryer may solve the situation. Contact a competent representative from an ethical compressor house if the situation is suspected.
Perform The Next Steps With Extreme Caution!!!
Only Personnel Familiar With Electrical Mechanical Machinery Should Perform These Steps
BEFORE TAKING THE NEXT TWO STEPS IT IS IMPERATIVE YOU UNDERSTAND AND FOLLOW ALL APPLICABLE OSHA, LOCAL AND COMPANY SAFETY POLICIES AND PROCEDURES!!!
In the case of a dirty or restricted after-cooler simply clean the cooler. Take care in the cleaning process. You must shut down the compressor, depressurize and secure the power following OSHA approved procedures and methods. Safe, correct cleaning materials and methods may be used. Before restarting the unit, care must be taken to assure all cleaning materials and any chemicals have been completely removed from the cooler core and the fan assembly.
If there is trash or debris blocking the cooling air to the cooler, you mustde-energize the compressor and wait for the fan to stop rotating in order to proceed safely. Then secure the power to the unit and remove the debris or trash. Then you may visually inspect the cooler core and the fan assembly for apparent damage before placing the unit back in service.
Test the receiver drain for correct operation. In a correctly designed and configured compressed air system the receiver tank will always be located between the discharge of the air compressor and the inlet filter of the dryer. This arrangement allows the air to have residence time in the tank. Water and contaminants fall out of the air as well as additional cooling to take place. A nonoperational or blocked drain causes liquid water to accumulate in the bottom of the tank and may be drawn back into the air stream.
This Condition Will Require a Licensed Refrigeration Tech
The next item to consider in refrigerated air dryer troubleshooting is the suction pressure gage. If the gauge is not in the “green” zone, there is a likelihood the refrigerant is not at the correct level. No color code requires a qualified and licensed technician. Different dryers using different refrigerants will have unique pressures. If there is no suction pressure gauge the technician must connect gauges as part of a troubleshooting process.
Recapping The Troubleshooting Steps
- Make sure the valves are in the service valves and the bypass valves are in the correct position
- Ascertain the drains on the dryer and the aftercooler are working
- There must be no trash or debris blocking the cooler cores of the aftercooler and the dryer.
- Make sure the coolant is at the correct level in the dryer
- Make sure the ambient air temperature of the installation site is at or below the design specification of the dryer
Still in need of support? Contact us today!